
So, I decided to spin it up on my Oracle Cloud instance.
If you look at the official Coolify documentation, the installation process seems like a dream. They give you a single one-liner to run: curl -fsSL https://cdn.coollabs.io/coolify/install.sh | bash.
But if you are deploying this on Oracle Cloud, running that script immediately is a trap. You’ll sit there waiting for the dashboard to load on port 8000, and it will just time out. The official docs gloss over the fact that Oracle has some of the most unforgiving, paranoid default firewall rules of any cloud provider.
Before you even touch the Coolify script, you have to fight the networking layer.
The Double Firewall Trap
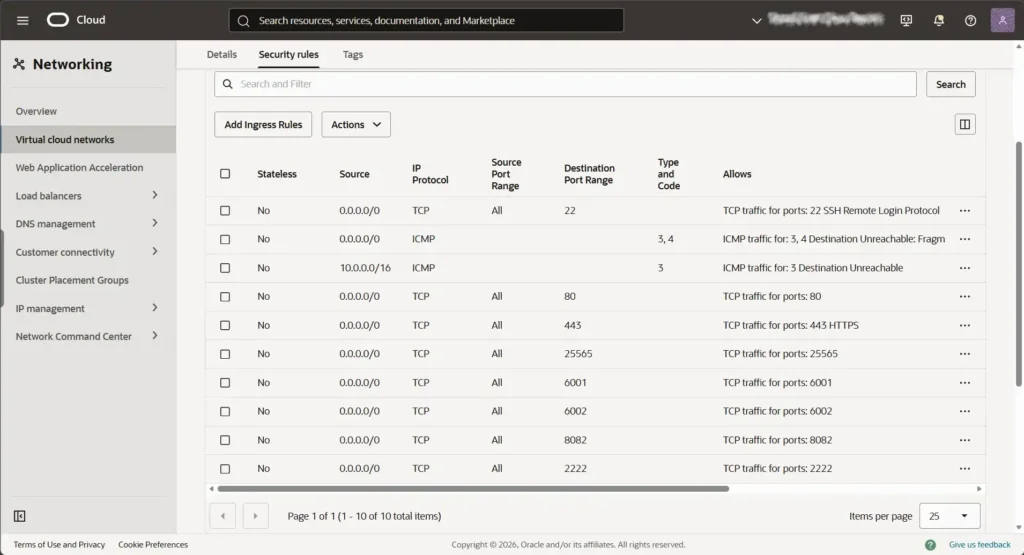
Oracle actually blocks you in two different places. First, there’s the Cloud Dashboard. You have to navigate through the maze of your Virtual Cloud Network (VCN), find your Public Subnet, and edit the Default Security List. You need to manually add Ingress Rules for ports 80 (HTTP), 443 (HTTPS), and 8000 (which Coolify uses for its dashboard).
But doing that isn’t enough. Oracle’s default Ubuntu images come with iptables configured to drop external traffic regardless of what the VCN says.
I’ve lost count of how many times I’ve seen developers pull their hair out over this. You have to SSH into the instance and force the OS to open the ports at the system level. Running these four lines saves hours of debugging:
sudo iptables -I INPUT -p tcp -m tcp --dport 8000 -j ACCEPT sudo iptables -I INPUT -p tcp -m tcp --dport 80 -j ACCEPT sudo iptables -I INPUT -p tcp -m tcp --dport 443 -j ACCEPT sudo netfilter-persistent save
Actually Running the Setup
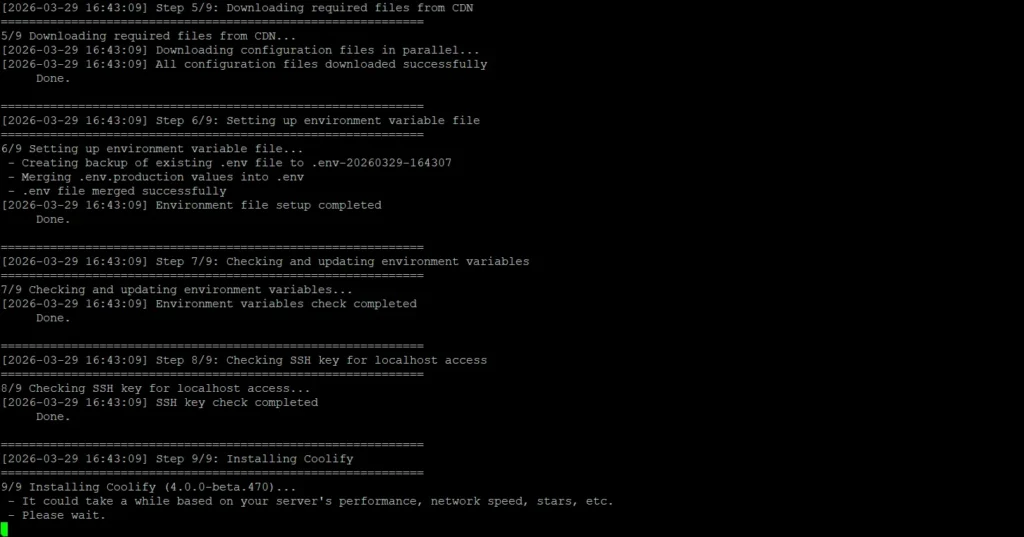
Once the network is actually open, Coolify’s one-liner works exactly as advertised. You paste the curl command, let it pull the Docker images, and after a few minutes, your terminal gives you the green light.
There is one critical thing to keep in mind here: the moment that script finishes, your Coolify dashboard is live on the internet at your server’s IP address on port 8000. There is no default password. The very first person to visit that URL gets to create the root admin account. You need to open your browser and claim that account immediately before an automated bot scanning AWS/Oracle IPs finds it.
Moving to Production
Using an IP address and port 8000 is fine for an afternoon experiment, but to actually use it, you need a domain.
I pointed an “A” Record from my domain registrar to the Oracle public IP. Inside the Coolify dashboard, under the Settings menu, there’s a field for the FQDN (Fully Qualified Domain Name). Once you drop your domain in there (likehttps://coolify.yourdomain.com), the built-in Traefik proxy takes over. It automatically provisions a Let’s Encrypt certificate and secures the dashboard.

And that’s the whole setup. You now have a production-ready PaaS running on infrastructure that costs practically nothing. Remember that you can do this on any Linux VPS.
The initial clash with Oracle’s iptables is annoying, but once you get past it, the ability to spin up PostgreSQL databases and Node environments in seconds makes the upfront friction entirely worth it.
